Unlocking the full potential of your NVIDIA graphics card is like fine-tuning a high-performance engine; it’s all about the right adjustments. Whether you’re chasing the adrenaline rush of flawless gaming, the precision of professional content creation, or simply craving the crispest visuals your desktop can deliver, mastering the NVIDIA Control Panel settings is your ticket to peak performance.
Diving into the NVIDIA Control Panel might seem daunting, but it’s your secret weapon for an unparalleled visual experience. With a few tweaks here and there, you’ll see your graphics card leap to life, delivering smoother frames, sharper images, and an overall boost that’ll leave you wondering how you ever settled for default settings. Let’s get those gears in motion and show you how to set the NVIDIA Control Panel for the performance you deserve.
What is Nvidia Control Panel?
You’ve heard about the NVIDIA Control Panel, but what exactly is it? It acts as a centralized software interface, part of the NVIDIA graphics drivers that you install on your computer. This powerful tool is where you can adjust performance, tweak visual quality, and fine-tune a plethora of other settings related to your NVIDIA graphics card.
Maximize Your Graphics Card’s Capabilities with the NVIDIA Control Panel, making sure every game you play or content you create looks as stunning as possible. It’s not just about boosting frames per second (FPS) for gamers; it’s also ensuring crisp, clean visuals for everyone, from professional designers to casual users seeking that visual edge.
Learning your way around the NVIDIA Control Panel might seem complex, but it’s user-friendly. With tabs and menus neatly organized, you can easily navigate through the various options. Adjust your 3D settings for ultimate game performance, manage your display’s color settings for richer, more vibrant colors, or optimize power management modes for better system efficiency.
Here’s a snippet of what you can do:
- Fine-tune 3D Settings for optimizing game performance or image quality
- Change Resolution and Refresh Rate to match your monitor’s capabilities
- Adjust Color Settings for more accurate on-screen colors
- Manage Display Scaling for crisp visuals on different-sized screens
- Alter Multiple Displays setup for an expanded workspace
The NVIDIA Control Panel is continually getting updates, ensuring you have the latest tools and features to get the most out of your graphics card. It keeps your system performance in line with new games and software, meaning you’ll have a setup that’s both cutting-edge and tailored to your needs.
By taking the time to understand the NVIDIA Control Panel and configure it to your preferences, you’ll witness an unmistakable enhancement in how your computer handles graphics-intensive tasks. With settings optimized, your NVIDIA card will effortlessly deliver the robust performance and eye-catching visuals you expect.
Why are Nvidia Control Panel settings important?
When you’re looking to extract every ounce of performance from your computer, the NVIDIA Control Panel settings play a pivotal role. Think of the Control Panel as your personal command center, guiding your graphics card to deliver the exact experience you’re after. Understanding and manipulating these settings can mean the difference between subpar graphics and a stunning visual experience.
Tailoring 3D settings is crucial for both gamers and content creators. For gamers, adjusting these settings can maximize frame rates, reduce lag, and offer more immersive and responsive gameplay. On the other hand, content creators can benefit from improved rendering times and enhanced image quality, crucial for tasks like video editing or 3D modeling.
Moreover, by delving into the 3D Settings tab, you’re given control over various aspects that affect performance. Options such as ‘Antialiasing’ and ‘Texture filtering’ can be fine-tuned to strike the perfect balance between visual fidelity and frame rates. For instance, optimal antialiasing helps eliminate jagged edges, making your games look smoother and more realistic.
Conversely, don’t overlook the importance of the color and display settings available in the Control Panel. These allow you to adjust color vibrance, contrast, and resolution, which can make a substantial difference in visual clarity and color accuracy. For professionals who rely on precise color representation for work, these adjustments are indispensable.
Adjusting NVIDIA Control Panel settings also benefits those aiming to keep up with compatibility and performance demands. With regular updates, the Control Panel ensures that your graphics card remains equipped to handle the latest software and games. This forward-compatibility is a crucial aspect of maintaining an optimized system.
Remember, there’s no one-size-fits-all approach. Each tweak contributes to a personalized computing experience that meets your specific needs. Whether you’re a hardcore gamer, professional content creator, or just seeking the best possible visual quality, taking the time to understand and adjust your NVIDIA Control Panel settings is a step toward making the most of your graphics card’s capabilities.
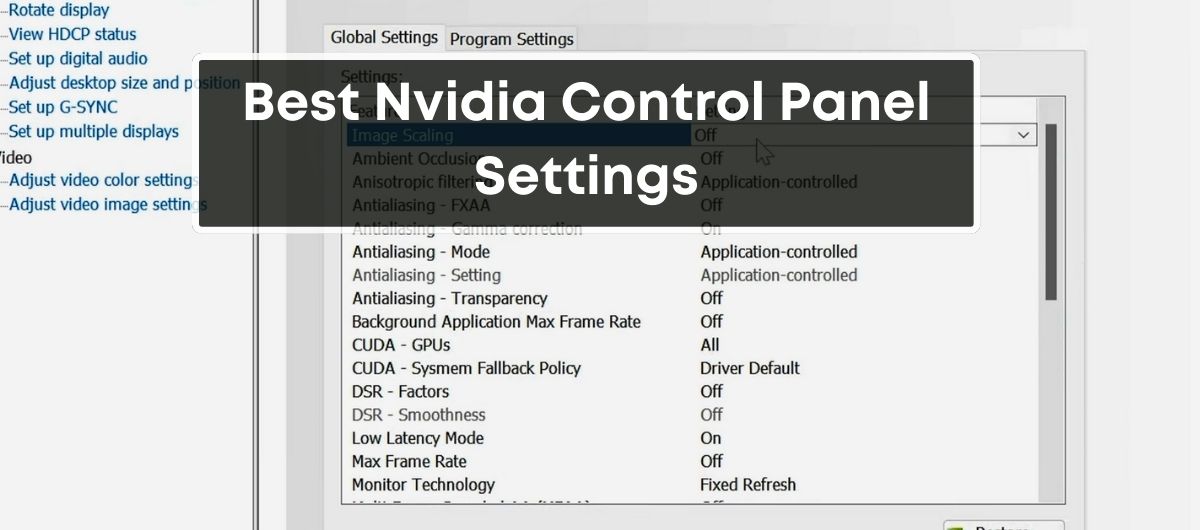
Basic Settings in Nvidia Control Panel
Adjusting your Nvidia Control Panel settings can profoundly affect your visual experience, whether you’re looking to enhance gaming performance or improve your day-to-day computing activities. Navigating through the various options can be overwhelming, but focusing on the basic settings can provide a solid foundation for optimizing your system’s graphics.
Display Settings
When diving into Display Settings, you’ll find an array of configurable options that align with your specific preferences and monitor capabilities. Adjustments in this area are essential for achieving accurate color representation and the smoothest visual output.
- Color Settings: Personalize your screen colors by tweaking the brightness, contrast, and gamma to suit your environment and preferences. You’ll see immediate effects, so feel free to experiment until you hit the sweet spot.
- Rotating Displays: Often overlooked, the ability to rotate your display orientation can be a game-changer for specific applications or reading documents.
- View HDCP Status: Mainly a troubleshooting tool, checking your High-bandwidth Digital Content Protection (HDCP) status is crucial for ensuring secure, digital transmission of HD content to your display.
- Set Up Digital Audio: Ideal if you’re using an HDMI or DisplayPort connection that handles both audio and video, ensuring your sound output is correctly configured.
Resolution Settings
Your Resolution Settings are the powerhouse behind the sharpness and clarity of images on your screen. Here, you can push the limits of your display and even enhance it beyond out-of-the-box capabilities.
- Custom Resolutions: By accessing the Customize feature, you have the freedom to define resolutions and refresh rates, catering to your desire for finer details or smoother motion in visuals.
- Color Depth and Dynamic Range: Delve into advanced options such as Output Color Format and Output Dynamic Range. Choose ‘RGB’ and ‘Full’, respectively, for robust color representation, especially if your GPU defaults to suboptimal color settings.
Additionally, it’s critical to ensure that the UI scaling in your operating system aligns with the graphics settings to avoid display anomalies, particularly in creative applications like Adobe Premiere Pro or After Effects. Opt for UI scaling options that are multiples of 50—150%, 200%, 250%—to prevent compatibility issues and maintain crisp, clean visuals throughout your user interface.
By understanding and adjusting these foundational settings in the Nvidia Control Panel, you’ll pave the way for a superior visual experience tailored to your personal needs and preferences. Keep in mind that these settings can be revisited and refined as your requirements evolve or as you upgrade your system to continue delivering the best possible performance from your Nvidia graphics card.
Advanced Settings in Nvidia Control Panel
Optimizing the advanced settings in your Nvidia Control Panel can greatly enhance your gaming and creative software applications. With a few tweaks, you’ll see improvements in graphics performance and image quality without compromising on speed.
3D Settings
Delving into the 3D Settings of the Nvidia Control Panel, you’ll find powerful options to boost your visual experience. The Adjust Image Settings With Preview option allows you to prioritize performance or quality. If you’re aiming for maximum frames per second (FPS) in fast-paced games like CSGO, dragging the slider towards performance is beneficial.
For a tailored experience, you can use the Manage 3D Settings to apply preferred settings globally or to individual programs. Numerous gamers and creatives have found striking the right balance between performance and visual fidelity here can lead to a significantly smoother and more immersive experience.
Manage 3D Settings
Customization is key within the Manage 3D Settings tab. You can choose individual games or applications to configure, such as Counter-Strike: Global Offensive. Here you can fine-tune settings like Image Sharpening and Ambient Occlusion—both of which are often turned off to enhance performance. Gamma Correction is a hidden gem that, when turned on, ensures a more accurate representation of colors and shadows in your 3D applications.
The Max Frame Rate setting is crucial for gamers, as limiting the number of frames can reduce latency, leading to a more responsive gaming experience. This setting is particularly useful when looking to optimize your setup for competitive gaming scenarios where every millisecond counts.
Texture Filtering Quality
Texture quality directly impacts the visual clarity in games and 3D applications. In the Texture Filtering Quality settings, you have the opportunity to adjust this parameter to meet your specific needs. While a high-quality filter may enhance visuals by making textures appear sharper, especially at greater distances, it can also tax your GPU.
By setting Anisotropic Filtering to Application-controlled, you allow the game to make the best use of its in-built texture filtering. However, for GPUs capable of handling the load, setting it to a higher value like 16x can substantially improve image quality without a significant performance penalty.
| Texture Filtering Settings | Recommended Value |
|---|---|
| Anisotropic Filtering | Application-controlled/16x |
Antialiasing
Antialiasing plays a pivotal role in how smooth the graphics in your game appear. It reduces the jagged edges that can occur on diagonal lines and curves within your digital environment. The Nvidia Control Panel allows you to override application settings to implement a variety of antialiasing techniques.
For the best balance between performance and visual aesthetics, you might want to set Antialiasing Mode to Application-controlled, allowing each game to optimize its settings. However, disabling features like Transparency Antialiasing can provide a small boost to FPS, which can be beneficial in competitive scenarios where speed trumps visual detail.
Remember, tweaking these settings can lead to different outcomes depending on your system’s configuration and the specific requirements of the applications you’re running. It’s always best to test your changes to find the perfect balance for your use case.
Performance Settings in Nvidia Control Panel
Navigating through the Nvidia Control Panel settings can be quite the task, but some key tweaks will significantly boost your system’s performance. The right adjustments to the settings can transform your gaming experience, ensuring seamless gameplay, and content creation.
Power Management Mode
When you dive into the Nvidia Control Panel, you’ll find Power Management Mode, a critical setting for optimizing your system’s graphics performance. By default, it’s often set to Adaptive, which does a good job by adjusting the graphics card’s power usage according to the current tasks. But when it comes to performance, Prefer Maximum Performance is the setting you’re looking for.
Here’s the difference it makes:
- Adaptive: Saves power when full GPU strength isn’t required
- Prefer Maximum Performance: Keeps your GPU running at peak rates to deliver top performance regardless of tasks
To adjust the Power Management Mode:
- Navigate to the 3D Settings menu
- Locate Power Management Mode
- Select Prefer Maximum Performance
- Click on Apply to save the setting
This change pushes your GPU to stay in high-performance mode, catering to the demands of power-intensive tasks like 3D rendering and gaming.
Maximum Pre-Rendered Frames
Maximum Pre-Rendered Frames is another crucial setting within the Nvidia Control Panel that affects your overall system responsiveness. This setting controls the number of frames that the CPU can prepare before the frames are processed by the GPU. It’s a balance between frame rate and input lag.
For high-performance gaming where every millisecond counts, setting Maximum Pre-Rendered Frames to 1 or 2 can drastically reduce input lag, thereby making the gameplay feel more responsive. However, if your system struggles with consistent frame rates, allowing a higher pre-rendered frames value may smooth out the experience.
Adjusting Maximum Pre-Rendered Frames:
- In the 3D Settings menu, scroll to find Maximum Pre-Rendered Frames
- Choose a lower value (1 or 2) for less input lag and higher responsiveness
- Higher values can be tested for stability in frame rates
- Confirm the changes by selecting Apply
Remember, tweaking these settings is about finding the right balance for your specific system configuration and your personal preference for either performance or visual quality. Make adjustments gradually, and test each change to see how it impacts your system’s behavior.
Optimal Settings for Different Applications
When you’re fine-tuning your NVIDIA Control Panel, it’s key to customize settings based on the specific apps you use. Whether you’re gaming, video editing, or diving into graphic design, the right tweaks can vastly improve your experience.
Gaming
For gamers, visual fidelity and frame rate are paramount. Higher resolutions provide crisper images but may decrease performance. Most monitors will automatically detect the native resolution, which ensures the sharpest image. However, for enhanced performance on more graphically intensive games, consider lowering the resolution. In the NVIDIA Control Panel, under the Manage 3D settings tab, make sure Anisotropic Filtering is set to Application-controlled or 16x if you have a modern GPU. This will sharpen distant textures without a significant impact on FPS.
If you’re facing screen tearing, enable Vertical Synchronization (VSync) to match your game’s frame rate with your monitor’s refresh rate. However, remember that VSync can introduce input lag, important to consider in competitive gaming environments. It’s a trade-off between visual smoothness and responsiveness that you’ll need to balance based on the game you’re playing.
Video Editing
For video editing, GPU acceleration is a game-changer. When you navigate to the Desktop options within the NVIDIA Control Panel, you may find the Video Editing Mode. While this feature has been largely sidelined with technological advancements, especially since Windows 10, it indicates the importance of GPU processing in video applications.
Optimal settings for video editing tasks should leverage your GPU’s strength in video encoding and effects processing. Ensure Preferred Graphics Processor is set to Auto to make efficient use of your system’s resources and preserve battery life. It’s usually best not to alter Program Settings as they’re fine-tuned for collaboration between NVIDIA and software like Adobe. Unless you’ve got specific adjustments in mind after extensive testing, trust the default configurations.
Graphic Design
Graphic designers leveraging applications like Adobe Photoshop or Illustrator benefit immensely from optimized texture filtering and color accuracy. Anisotropic Filtering can be particularly useful in graphic design to maintain texture quality at different angles. Unlike gaming where FPS can take priority, in graphic design, you may want the Anisotropic Filtering set to the highest value your GPU supports, normally 16x.
Ensuring your color settings are accurate is crucial for design work. Head over to Adjust desktop color settings in the NVIDIA Control Panel to calibrate brightness, contrast, and gamma to match your work’s true colors. Keep in mind that running your GPU at high power settings for programs that aren’t as GPU-intensive can be overkill, so consider tailor-fit settings for each application or the overall graphics profile for your daily design tasks.
Conclusion
Tweaking your NVIDIA Control Panel settings can unlock the full potential of your graphics card, elevating your gaming, video editing, or graphic design experience. Remember, the perfect balance between performance and visual quality depends on your personal preference and system capabilities. Don’t be afraid to experiment with different configurations to find what works best for you. Armed with the knowledge from this guide, you’re now ready to take control of your visual destiny. Happy optimizing!
Frequently Asked Questions
What is the best setting for Nvidia control panel?
For optimal performance and quality, adjust NVIDIA Control Panel settings to include: Low Latency Mode, OpenGL Rendering GPU, Power Management Mode set to “Prefer maximum performance”, high-quality Texture Filtering, PhysX Engine assigned to the GPU, the highest available Resolution & Refresh Rate, color settings fine-tuning, and enabling GSync if available.
Should scaling be on GPU or Display?
Scaling should be set on GPU for players who prefer playing older games on modern displays, as it preserves gaming experience. For those prioritizing clarity and readability for UI elements at high resolutions, display scaling is recommended.
Should I turn off VSync in Nvidia control panel?
Turning off VSync may be beneficial when frame rates are significantly higher than the display’s refresh rate, to prevent screen tearing. However, this may cause stuttering if frame rates drop below the refresh rate. It’s best to experiment with VSync on and off to see what works best for your situation.
How to increase Nvidia GPU performance?
To increase NVIDIA GPU performance, update to the latest drivers, optimize in-game settings, overclock the GPU for higher speeds, improve cooling to maintain performance, and ensure your computer power settings are configured for maximum performance.
Does RAM increase FPS?
Yes, RAM can influence FPS by providing sufficient memory for smooth gameplay. Faster, more ample RAM can assist with frame pacing and overall performance, but its impact may vary depending on the specific game and system configuration.