Unlocking the full potential of your NexiGo webcam starts with fine-tuning the settings to match your environment and lighting. Whether you’re gearing up for a critical Zoom meeting or recording content, the right adjustments can make all the difference.
Dive into the NexiGo webcam settings app, a user-friendly software that hands you the reins to control brightness, saturation, and exposure. This guide will walk you through optimizing these settings to ensure you’re seen in the best possible light.
Why Webcam Settings Matter
Clarity and Image Quality
You’ve likely realised that even the most expensive webcams can fall short when it comes to delivering crisp, clear video. Fine-tuning your NexiGo webcam settings is therefore crucial for enhancing the Clarity and Image Quality of your video output. Adjusting settings like brightness, contrast, saturation, and ensuring that autofocus is enabled can help you present a sharp image. Remember, videoconferencing software may compress your video, but with the right settings, you can mitigate some quality loss. By tweaking these options, you’ll ensure your audience sees a detailed and vivid picture, rather than a blurry or washed-out version of you.
Lighting and Exposure
The impact of proper lighting on your video cannot be overstated. Your environment plays a significant role, but properly adjusting your lighting and exposure settings can compensate for less-than-ideal conditions. Playing with the exposure and white balance manually allows you to adjust for overly cool or warm tones, and prevents the overexposure of highlights that can wash out your video feed. With optimal lighting settings, your NexiGo webcam is capable of producing a balanced and professional-looking image regardless of your surroundings.
Framing and Composition
The best webcams offer various settings that affect not just the quality, but also the Framing and Composition of your shot. Adjustments like zoom, pan, and tilt give you control over the camera’s focus and allow you to frame yourself appropriately within the scene. Engaging composition keeps viewers focused on you and ensures a more impactful presence in every call or recording. A well-composed shot, paired with sound clarity and visual quality, can significantly enhance your professionalism and the effectiveness of your communication.
Recommended Webcam Settings
Properly configuring your NexiGo webcam ensures high-quality video for your online interactions. It’s not just about what the camera can do but also how you set it up. Dive into the best settings to fine-tune your webcam for stellar image quality and professional-looking results.
Resolution and Frame Rate
To start off, selecting the right resolution and frame rate is crucial for clear and smooth video. While NexiGo webcams can capture high-resolution footage up to 1080p, it’s key to match your settings with your needs. For most video calls, a resolution of 1080p offers a sharp image without overloading your bandwidth. It’s more than sufficient for crisp, detailed visuals.
| Resolution | Frame Rate | Ideal Usage |
|---|---|---|
| 720p | 30 fps | Basic video calls |
| 1080p | 30 fps | Professional meetings, streams |
| 1080p | 60 fps | Detailed recordings, dynamic streams |
If you’re focusing on recording rather than live streaming, choose a higher frame rate such as 60 fps, if your NexiGo supports it, for a smoother video experience.
White Balance and Color Correction
The white balance setting is pivotal for maintaining the true colors in your video. Incorrect white balance can lead to unnatural skin tones or an overall odd color cast in your video. The auto white balance feature in NexiGo webcams is typically reliable. However, if your video feed looks too warm (orange) or too cool (blue), make subtle adjustments until the colors appear natural.
Color correction goes hand-in-hand with white balance. Your NexiGo software might offer automatic brightness and color correction. Test these settings in your environment to ensure they deliver the best results without manual intervention.
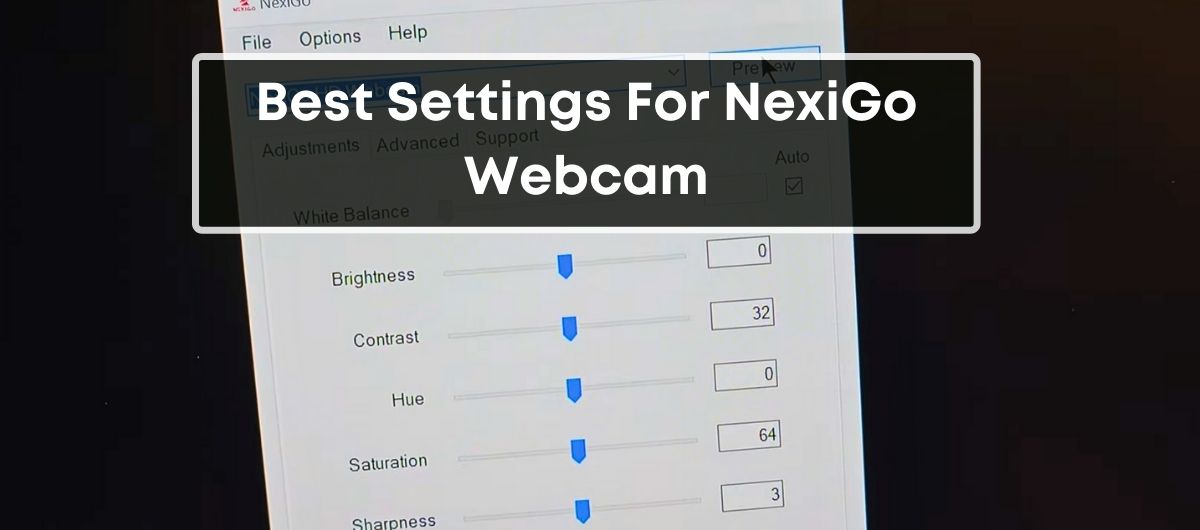
Brightness and Contrast
Ideal brightness and contrast settings enhance the quality of your video. Adjust these sliders in the NexiGo software to avoid a video that’s either too dark or too light.
- For Brightness, if your workspace is underlit, you’ll need to increase this setting carefully to illuminate your face without overexposure.
- Contrast needs a balanced approach as well, particularly if you’re facing the challenge of distinguishing yourself from the background.
Focus and Depth of Field
The focus feature of your NexiGo webcam plays a vital role. Auto-focus is a powerful tool, especially if you move around a lot during calls or presentations. For a static scene, you might prefer to set the focus manually, ensuring that the subject remains sharp at all times.
Depth of field, while often overlooked, can impact the feel of your video. Playing with focus settings can either bring everything into sharp relief or create a soft background, highlighting only your presence.
Noise Reduction
To deal with grainy images, especially in poor lighting conditions, enable the Noise Reduction feature. This setting helps to smooth out the image, reducing the visual “noise” that can make your video look unprofessional.
Ensure that noise reduction is not set too high, as this might lead to loss of detail. Adjust it until you reach the sweet spot where your image is clear without looking artificial. Your NexiGo webcam’s software should provide a straightforward way to manage this balance.
With these settings mastered, you’re well-equipped to present a polished and engaging video feed. Now, ensure your background is tidy, your lighting is complementary, and let your NexiGo webcam do the rest.
Advanced Webcam Settings
When you’re looking to take your video experience to the next level, understanding and tweaking advanced webcam settings can make a substantial difference. Let’s dive into some of the more sophisticated adjustments you can make to optimize your NexiGo webcam for various scenarios.
Shutter Speed and Aperture
Adjusting the shutter speed and aperture of your webcam might not be as straightforward as it is on a professional camera, but some webcams do offer settings that mimic these adjustments to improve image quality. A fast shutter speed can reduce motion blur, making it ideal for capturing quick movements during live streams or gaming sessions.
On the other hand, aperture affects the depth of field and the amount of light entering the lens. For webcams that allow these adjustments, tweaking to a wider aperture can help in low-light conditions, ensuring your video feed remains bright and clear.
ISO Sensitivity
ISO sensitivity is a critical setting in photography and videography that affects image quality. Higher ISO settings can brighten your video but may introduce noise or grain to the image. Ideally, you’ll want to keep the ISO as low as possible while still achieving a well-lit video feed. Some advanced webcams allow you to modify ISO settings, so experiment to find a balance between brightness and clarity.
Audio Settings and Microphone
Audio clarity is just as important as video quality. Ensure your NexiGo webcam’s microphone levels are properly adjusted for clear audio without distortion. If your webcam features noise reduction capabilities, turning it on can minimize background noise and focus on your voice. Fine-tuning the sensitivity level will help pick up your voice clearly, even if you’re not directly in front of the webcam.
Background Blur and Virtual Backgrounds
The option for background blur and virtual backgrounds can make your video calls more professional by keeping the focus on you. Webcams with advanced software may offer these features, allowing you to blur the background or replace it entirely with an image of your choice. This is particularly useful for maintaining privacy or hiding a cluttered space.
Customizing Settings for Video Calls
Customize your settings based on the video call platform you’re using. Lighting, composition, and background should be tailored to fit the frame and requirements of the software. Prioritize autofocus and automatic white balance to maintain consistent image quality throughout the call. Additionally, some platforms offer in-app enhancements that you can use in conjunction with your webcam’s features for an optimal video call experience.
Perfecting these advanced settings will ensure that your NexiGo webcam performs at its best, providing a professional-grade video experience for all your online interactions. Remember to frequently test different configurations to see what works best for your unique setup.
Troubleshooting Webcam Issues
When you’re trying to connect for an important video call, the last thing you want is technical difficulties. Don’t fret though; many common NexiGo webcam problems can be easily solved. Here, you’ll discover effective troubleshooting tips to ensure your webcam runs smoothly.
Webcam Not Detected
If your computer doesn’t recognize your NexiGo webcam, there are a few steps you should take:
- Check your connections: Ensure that the USB cable is securely plugged into both the webcam and your computer’s USB port.
- Restart your system: Sometimes, a simple restart can help your computer detect new hardware.
- Update drivers: Visit the NexiGo website for the latest driver updates compatible with your operating system.
- Test with another port or computer: This can determine if the issue is with the webcam or the USB port itself.
Image Freeze or Lag
An image freeze or lag can disrupt the flow of your communication. To address this issue:
- Close unnecessary programs: Running multiple applications can slow down your computer, affecting webcam performance.
- Adjust your webcam settings: Lower the resolution or frame rate in the NexiGo Webcam software to reduce the demand on your computer’s resources.
- Check for interference: USB device interference can cause lag. Ensure other devices aren’t overloading your USB bus.
Poor Audio Quality
A webcam’s audio quality is vital for clear communication. If your NexiGo Webcam’s microphone isn’t performing:
- Select the correct audio input device: In your video software settings, ensure the NexiGo Webcam microphone is the default.
- Adjust microphone sensitivity: Tweaking the microphone sensitivity in the webcam’s software might improve audio clarity.
- Test the microphone: Record a clip to see if the issue persists, and confirm the microphone isn’t muted.
- Reposition the webcam: Angle your NexiGo Webcam away from direct light sources to reduce glare.
- Adjust your environmental lighting: Use diffused lighting in your room for even, soft illumination that minimizes harsh shadows.
- Customize webcam settings: Increase the exposure or adjust the white balance for better video quality under various lighting conditions.
Conclusion
Armed with these insights, you’re now equipped to tackle any NexiGo webcam hiccups with ease. Remember, smooth operation and stellar video quality are within reach by checking connections, keeping drivers up-to-date, and fine-tuning your settings. Don’t let poor lighting cast a shadow on your video calls—adjust your environment and webcam options to shine. With your webcam now optimized, you’re all set to connect with confidence, whether it’s for work, streaming, or catching up with loved ones.
Frequently Asked Questions
How do I increase my webcam FPS?
To increase your webcam’s frames per second (FPS), access the webcam’s settings, then locate and select the “Frame Rate” tab. Here, you can choose a higher frame rate for smoother video playback.
How do I reduce my webcam latency?
To reduce webcam latency:
- Ensure a high-speed internet connection.
- Tweak your camera settings for efficiency.
- Update all relevant drivers and software.
- Regularly clean your lens and microphone.
- Opt for a clean and well-lit environment.
- Use a headset or earphones for better audio syncing.
How do I adjust my NexiGo camera settings?
To adjust your NexiGo camera settings, use the provided webcam application. Click on “Preview,” then use the “Set Resolution” dropdown menu at the top of the Preview window to alter resolution and FPS settings.
What is the best resolution for a webcam?
For professional-quality videos, look for webcams capable of 1080p or 4K resolution. A 720p webcam is adequate for budget livestreaming.
How can I make my 1080p webcam look better?
To make your 1080p webcam look better:
- Fine-tune webcam settings for optimal quality.
- Improve lighting conditions around the webcam.
- Evaluate and upgrade your microphone if necessary.
- Ensure your background is tidy and not distracting.
- Consider investing in advanced webcam technology for enhancements.