Encountering a BIOS ID check error on your Gigabyte motherboard can be a real headache, especially when you’re trying to ensure your system is up-to-date. This pesky error pops up when you’re flashing or updating BIOS, and it’s usually because the BIOS version doesn’t match your motherboard.
Don’t fret; you’re not alone in this. Many users have faced this issue, and it’s often triggered by a few common culprits, such as a mismatched BIOS version, a failed USB flash drive, or a poor internet connection. Thankfully, these problems have solutions, and you’ll be back to updating your system in no time.
How to Fix the Gigabyte BIOS ID Check Error?
The Gigabyte BIOS ID Check Error usually appears when you’re trying to update the BIOS but the update file isn’t matching your motherboard’s specific model.
Therefore, the first fix would be to confirm that you’ve downloaded the correct BIOS version from Gigabyte’s official website for your exact motherboard model.
Also, make sure that your USB is formatted to FAT32, the BIOS is updated, and the BIOS file is placed at the root directory of your USB drive.
If none of the solutions work, you should contact the Gigabyte customer support, especially if it’s still under warranty.
Gigabyte BIOS and its features
Overview of Gigabyte BIOS
The Basic Input/Output System (BIOS) plays a crucial role in booting up your computer by initializing the hardware components. When dealing with Gigabyte motherboards, their BIOS is renowned for stability and compatibility with a variety of processors and memory types. It’s the gateway enabling hardware communication, setting boot priorities, configuring devices, and enhancing system performance through overclocking. With Gigabyte’s Q-Flash and @BIOS utilities, you’re empowered to update and back up BIOS conveniently.
Version and Update Information
To ensure your Gigabyte motherboard operates seamlessly, it’s essential to keep the BIOS updated. Manufacturers release updates to address bugs, improve stability, and add new features. Here’s how you can find your current BIOS version and check for updates:
- Press
Windows Key + R, typemsinfo32and hit Enter to open System Information. - Locate the BIOS Version/Date in the System Summary.
- Visit the Gigabyte official website and enter your motherboard’s model number in the support section to find the appropriate BIOS update.
Remember, a BIOS update often includes critical fixes and security patches, so staying current is not only about enhancement but also about protection.
UEFI vs Legacy BIOS
Transitioning from Legacy BIOS to Unified Extensible Firmware Interface (UEFI) has marked a significant evolution in system firmware technology. UEFI offers a more user-friendly interface with graphical elements and mouse support. Here are some of the differences:
- Faster boot times with UEFI due to its optimized startup process.
- Support for large storage devices (over 2 TB), which Legacy BIOS cannot handle due to its limitations.
- Advanced security features like Secure Boot that protect against low-level malware attacks.
Whether it’s UEFI or Legacy BIOS, Gigabyte provides a sophisticated and flexible firmware environment tailored to your hardware needs—ensuring a smooth and secure operating experience.
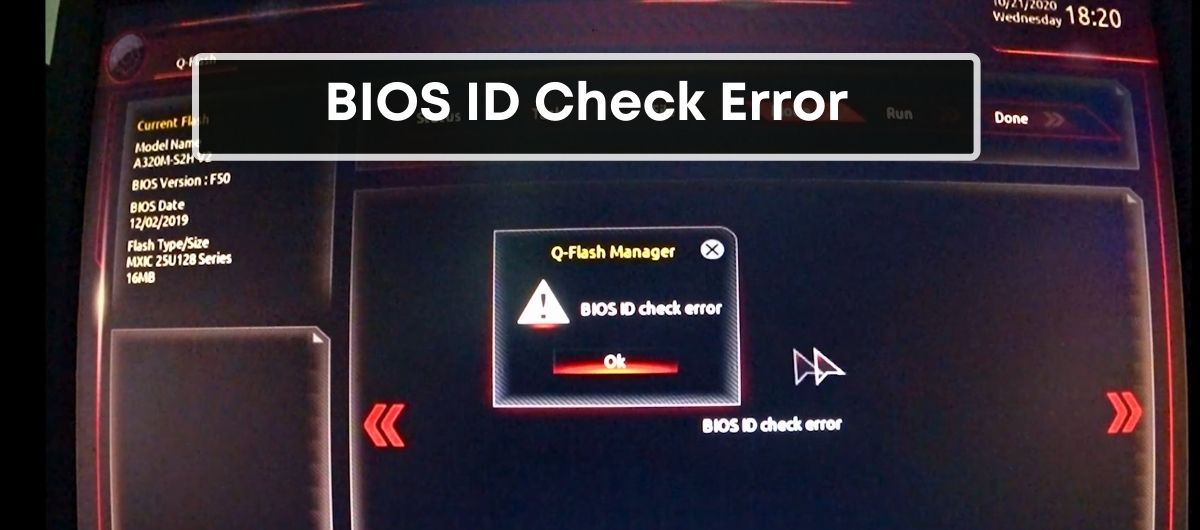
Understanding the “BIOS ID Check Error”
What Is the BIOS ID Check Error?
Encountering a BIOS ID check error during a firmware update is a common challenge that signals a mismatch between the BIOS version you’re attempting to install and your motherboard’s model. This error becomes obvious when the basic input/output system (BIOS) firmware – essential software that controls the boot process – doesn’t correspond with the hardware it’s intended for, thus the system raises a flag to prevent potential compatibility issues.
Possible Causes of the Error
Several factors might trigger a BIOS ID check error, and identifying the root cause is crucial to resolve the issue effectively:
- Mismatched BIOS Version: The primary reason for encountering this error is downloading a BIOS version that isn’t designed for your specific motherboard model.
- Corrupted BIOS Update File: An interrupted download or a flawed file could result in a corrupted BIOS update that the system cannot verify.
- Weak or Unstable Internet Connection: A poor connection may cause the download to fail, leading to an incomplete or incorrect BIOS file.
- Improper BIOS Update Procedures: Skipping steps or not following the update instructions accurately can lead to errors during the process.
- Incompatible Hardware: Recent changes to your system’s hardware, like installing new components, can cause a BIOS ID check error if the current BIOS does not support the new hardware.
- Outdated or Faulty Peripheral Devices: Sometimes, peripheral devices that are not functioning correctly may interfere with the BIOS update procedure.
Each of these causes requires a unique approach to troubleshoot and rectify the error to ensure successful BIOS updates.
Impact on System Stability and Performance
A BIOS ID check error can have significant repercussions on your system’s stability and performance. If unaddressed, these issues may manifest as:
- Boot Failures: An improper BIOS can prevent your computer from starting up, leading to a complete system halt.
- Hardware Incompatibility: The error reflects underlying compatibility issues that might render new hardware unusable until resolved.
- Increased Vulnerability: Outdated firmware can leave your system exposed to security threats if it lacks the latest protective features.
It’s essential to treat a BIOS ID check error with urgency to maintain the integrity of your computer’s operation and safeguard against potential performance bottlenecks or security vulnerabilities. By rectifying this error, you’ll pave the way for a smoother, more secure computing experience.
Troubleshooting the “BIOS ID Check Error”
When you’re facing the “BIOS ID Check Error,” it’s crucial to approach the problem methodically. This troubleshooting guide is designed to help you navigate the steps needed to fix this issue effectively.
Performing a BIOS Update
Updating your BIOS can seem daunting, but it’s often a necessary step to keep your system running smoothly.
- Check the manufacturer’s official website for the latest BIOS version.
- Ensure the downloaded BIOS update corresponds to your specific motherboard model.
- Use a formatted USB drive to prevent file corruption during the update process.
- Follow the provided instructions diligently to reduce the risk of update failure.
Important: Do not interrupt the BIOS update process—this can cause irreversible damage to your motherboard.
Restoring Default BIOS Settings
Restoring the BIOS to its default settings is a common fix for a range of issues, including the BIOS ID check error.
- Access the BIOS settings by pressing the designated key during startup, which might be ESC, F1, F2, F8, or F10.
- Navigate to the ‘Load Default Options’ dialogue box, often accessed by pressing F9, to reset the settings to factory defaults.
- Confirm the reset and exit the BIOS, allowing your computer to restart with the default settings.
Note: Resetting the BIOS will clear any customized settings that you have previously applied.
Clearing CMOS
Clearing the CMOS is another technique to reset your BIOS settings to default and resolve the BIOS ID Check Error.
- Power down your computer and disconnect it from any power sources.
- Open the computer casing and locate the CMOS battery on the motherboard.
- Remove the battery for five to ten minutes, then reinsert it to reset the BIOS settings.
Alternatively, if you prefer not to open up your computer, you can access the boot menu and select the option to reset the BIOS to default settings.
Upgrade the Motherboard
At times, when troubleshooting measures fail to resolve the BIOS ID check error, upgrading the motherboard might be your best bet.
- Consider compatibility with your current hardware, including the processor, RAM, and peripherals.
- Research and compare the latest motherboards that suit your computing needs and budget.
- Upgrading the motherboard is a significant change and should be undertaken with careful planning and consideration.
Each step you take brings you closer to resolving the “BIOS ID Check Error” and ensuring the longevity and stability of your system.
Preventing future BIOS ID Check Errors
A common clincher in ensuring the health of your computer’s BIOS is to avoid errors before they occur. You’ll want to particularly stave off the dreaded BIOS ID Check Error. Below, explore the preventative measures that could save you a headache down the road.
Regularly Updating BIOS
Staying current with BIOS updates is like taking your PC for a regular check-up; it’s essential for system health. Manufacturers often roll out updates to address bugs, improve performance, and ensure compatibility with new hardware. Keep in mind:
- Set a reminder to check for BIOS updates periodically.
- Visit your motherboard manufacturer’s official website for the latest firmware.
- Review the release notes for each update to understand the changes and improvements.
It’s not only about the latest features; it’s also a matter of security. BIOS updates often include security patches that protect your system from vulnerabilities. Ensuring your BIOS is up-to-date means you’re less likely to encounter compatibility issues or the BIOS ID Check Error in the future.
Best Practices for BIOS Configuration
A well-configured BIOS can be the difference between a stable system and one plagued with issues. When tweaking your BIOS settings:
- Document your current BIOS settings before making changes. This allows you to revert if necessary.
- Understand what each setting does before modifying it.
- Use the ‘Load Optimized Defaults’ option as a starting point for configuring your BIOS.
Configuring your BIOS correctly aids in harmonizing hardware and firmware, reducing the likelihood of errors. Avoid making unnecessary changes—stick to the configurations that suit your system’s needs.
Backing Up BIOS Settings
Before any major update or configuration change, it’s wise to back up your BIOS settings. This simple precaution can prevent loss of custom settings and provide a quick restoration point if problems arise. Here’s how to safeguard your BIOS setup:
- Look for a built-in utility in the BIOS menu to save your settings to a file.
- Store this file on an external drive or cloud storage as an extra measure of security.
- If your system offers it, take advantage of features that allow you to save profiles directly within the BIOS.
Backing up provides a safety net and ensures you can always return to a working BIOS configuration, reducing the risk of encountering the BIOS ID Check Error post-update. Make it a standard practice to back up before any BIOS update or significant system change.
Conclusion
Tackling the Gigabyte BIOS ID Check Error can seem daunting, but you’re now equipped with the knowledge to handle it confidently. Remember, maintaining your system’s BIOS is crucial for its health and performance. By staying on top of updates, methodically troubleshooting issues, and taking preventative steps, you’ll minimize risks and keep your machine running smoothly. Don’t let a BIOS hiccup throw you off—address it head-on and your system will thank you for the attention to detail and care. Keep your tech journey hassle-free and your hardware in top shape with these expert tips.
Frequently Asked Questions
What is Gigabyte BIOS?
Gigabyte BIOS is the Basic Input/Output System for motherboards manufactured by Gigabyte. It’s firmware that initializes hardware during the startup process and provides runtime services for operating systems and programs.
Why is it important to update my Gigabyte BIOS?
Updating your Gigabyte BIOS can fix bugs, improve system stability, enhance hardware compatibility, and add new features to your motherboard, improving overall system performance.
What is the “BIOS ID Check Error” and what causes it?
The “BIOS ID Check Error” typically occurs when the BIOS version being installed doesn’t match the motherboard model. Causes include mismatched BIOS versions, corrupted update files, weak internet connections, improper update procedures, and incompatible hardware.
How can I fix the BIOS ID Check Error?
To fix the BIOS ID Check Error, ensure you’re using the correct BIOS version, replace any failed USB drives, check the internet connection, verify all hardware compatibility, and follow the proper update procedures.
What advantages does UEFI have over Legacy BIOS?
UEFI provides better boot times, enhanced security features, support for larger hard drives, and a more user-friendly interface with graphical menus, compared to the more limited and text-based Legacy BIOS.
How do I update my Gigabyte BIOS?
To update your Gigabyte BIOS, download the latest firmware from the official website, transfer it to a USB drive, and use the motherboard’s built-in Q-Flash utility or an equivalent BIOS update application.
How can I prevent the BIOS ID Check Error?
To prevent the BIOS ID Check Error, regularly update your BIOS, ensure correct BIOS configuration, and always back up existing BIOS settings before applying new updates or alterations.